How to use 3D scanning technology to create virtual tours for your students
Here is how the University of Manchester is using 3D scanning technology to create virtual reality platforms that can be used in educational settings
You may also like
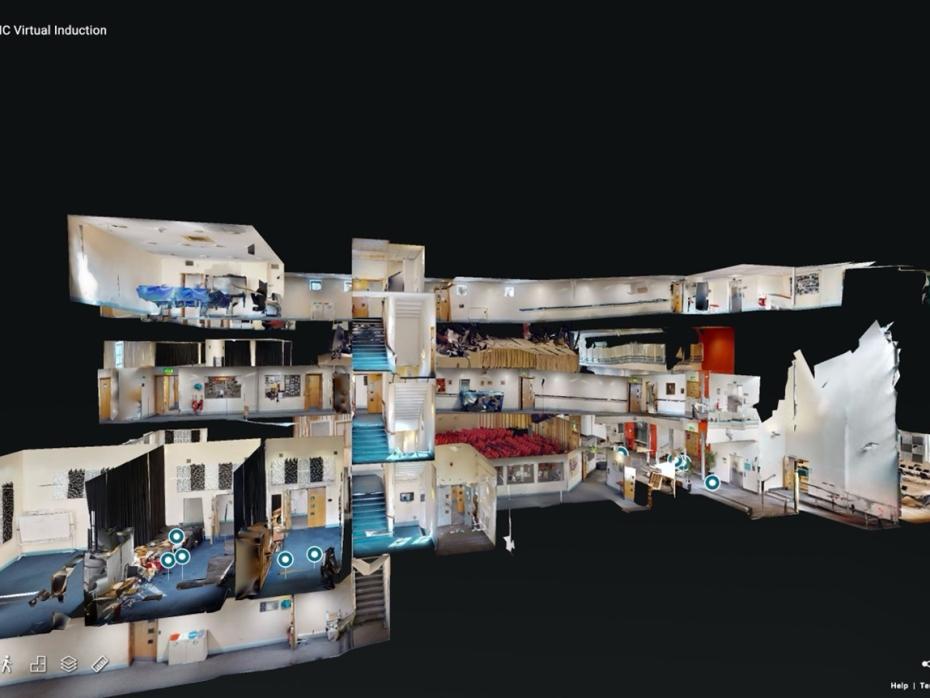
Virtual reality (VR) technology is fast becoming commonplace within higher education settings, with universities across the world pouring funding into improving student access to it. However, staff are still unsure of the many ways that it can be used to enhance learning. It is important to find ways to adapt and utilise these new tools to better students’ experience and encourage good practice, preparing them for the modern world of work. The humanities eLearning team at the University of Manchester facilitates weekly VR headset workshops with students and has established extended reality service groups to allow staff to apply these technologies in learning design and make VR more widely used and accessible to students. In this resource, I discuss how the Martin Harris Centre for Music and Drama at the University of Manchester has used Matterport 3D scanning technology to create a virtual student model of the building and tips on how to implement something similar at other institutions.
The music department in the Martin Harris Centre hosts an impressive selection of Steinway pianos, Baroque, percussion and gamelan instruments, as well as a professional 350-seat concert hall and recording studios. This specialist equipment is expensive and time-consuming to repair when misused. Teaching staff reported the frequent mistreatment of the spaces, particularly following the pandemic, such as food waste not being disposed of properly and equipment being left in an unusable state. Staff also noticed that students were unaware of who to contact for such repairs if needed, delaying the process further. As a result, we decided to run an induction to ensure students were aware of the information they needed to use the space and equipment appropriately.
Our eLearning team decided to use Matterport technology to create an interactive, professional and engaging resource and test its efficacy via a Google Form quiz afterwards to see how much knowledge students had gained as a result.
- Resoure collection: AI transformers like ChatGPT are here, so what next?
- Extended reality for extending education
- Get started with virtual reality for learning and teaching
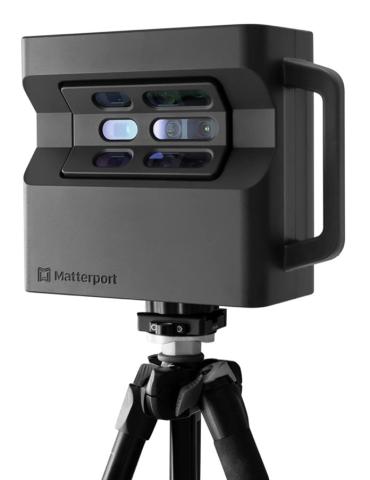
Matterport specifications:
- The Matterport uses a combination of photogrammetry and LIDAR technologies to create a 3D model.
- It produces a professional-grade image resolution at 134MP and 3D depth data.
- It can scan for eight to 10 hours on full charge.
How to create your own virtual scan
Items needed:
- Matterport: to produce your scans
- Matterport carry case: for safe transportation
- Tripod: to position the Matterport correctly in the space
- Tripod attachment: an adapter (if needed) to make sure the Matterport is level and can attach to the tripod
- Matterport licence: to allow you to use the software
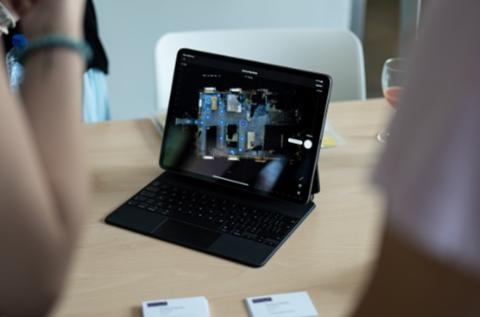
- Tablet: we used an iPad Pro 2 to control the Matterport.
1. Plan the scan
- Review the space you would like to create a virtual twin of. The Matterport responds best to a logical path around the room.
- Make a note of any windows or reflective surfaces that you will have to indicate on the Matterport app.
2. Set up camera
- Attach your Matterport to your extended tripod
- The tripod should be the height of an average person, around 5’7”
- Try to ensure the camera is positioned correctly on your tripod by using a spirit level.
3. Begin scanning
- Control the Matterport using the app on your tablet of choice. Press the circular button to start a scan
- Avoid catching yourself in the scan by walking around the back of the camera, or hiding behind a piece of furniture. You can use the app to control the Matterport from around two metres away
- It may take some trial and error for the Matterport to understand the space cohesively. You can preview each scan immediately
- Your goal is to fill in all the black ‘dotted’ areas on the scan with as much photo information as possible.
4. Upload your scan
- Use the Matterport app to upload your scan to the Cloud
- You can adjust privacy settings at this point.
5. Post-production
- Edit your scan to add information points and any other content you want to be visible on your digital twin
- These information points can be edited and updated at any time.
Creating the scan can be a time-consuming process, however, with practice and knowledge gained from trial and error, the process gets quicker. Repetitive features in a space such as rows of seating or blank walls may cause error messages and require rescanning. The exercise requires good problem-solving skills to confront the potential issues that may arise, as no two scan processes are the same.
At the end of this project, staff at the Martin Harris Centre fed back that they found the 3D “twin” induction effective for encouraging good behaviour across the building. Staff spent less time replying to queries about how to use the space via email and even found the digital twin useful in other areas, such as an alternative to an in-person open day for students unable to visit the building. The 3D model can also be used to help individuals with access needs navigate around an unfamiliar space. Further uses of this tool may include laboratory inductions or heritage tours of spaces that would otherwise be inaccessible to the public.
Overall interaction was high and results were positive. It was a cost-effective introduction to 3D scanning for our team and has potential benefits for administration, teaching and learning and the overall student experience.
Alexandra McGaughrin Cross is eLearning support assistant at the University of Manchester.
If you would like advice and insight from academics and university staff delivered direct to your inbox each week, sign up for the Campus newsletter.
